Instructions for Making Printed Envelopes
Printing and making the matching envelopes is really simple once you've done one. To get you started here's some (hopefully) easy to follow instructions for putting together the printable envelopes that are available here at Mint Printables.
Step 1: Check Printer Settings and Print
If you're printing directly from the webpage, adjust your margin setting (there's instructions on that page for most major browsers). When you're done that come back and go to step 2.
If you choose to save the image, check that your printer settings won't cut off the edges by using Print Preview. (Sorry, I can't give instructions for that since each printer is set up totally differently.)
Print out as many copies as you need. The envelopes work fine with standard paper, but if you'd prefer a more sturdy envelope, feel free to use a heavier printer paper.
Step 2: Fold
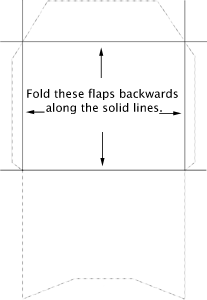
I find it easier to fold before cutting out the shape so that I don't accidentally lose the guide lines. Simply fold along the solid lines, folding the flaps of the envelope away from the printed side.

Step 3: Cut
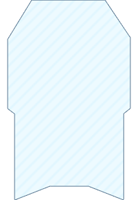
Cut along the dotted lines. Some of the envelopes have a solid color or pattern, for those, simply cut along the edge. You'll end up with a shape like this:

Step 4: Final Folding and Pasting
- Refold the 2 small side flaps along the guide folds you did in step 2. (Away from the printed side)
- Add a small amount of glue to the 2 side tabs.
- Fold the back of the envelope and attach to the side tabs.
Step 4: The finishing touches
There you have it... a finished envelope. After you've filled the envelope, glue the envelope's top flap down to close it and you're done.

 Car Signs
 Pretty Lace Labels
 Baby Girls 1st Birthday
 Baby Boys 1st Birthday
 Printing Practice
 Reward Coupons
 Vintage Stationery